appium 自动化项目架构 一、 项目结构 整体的编写逻辑:
1、先设计功能测试用例
2、然后分析这个用例,用到了那些页面,哪些元素,封装在 pages
3、将功能测试用例翻译成代码
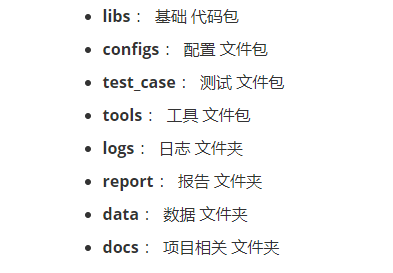
四包文件 : libs : 用于存放 基本的 代码;configs : 用于存放 配置文件;test_case : 用于存放 测试用例;tools : 用于存放 封装的 工具四文件夹: docs : 主要用于存放 和项目相关的文件;logo : 主要用于存放 项目执行的日志;report : 用于存放报告的 原始数据;data : 用于存放 测试数据;当 APP 自动化有多条测试用例的时候,我们很难保证上一条 case 的结束页面,恰好是下一个 case 的开始页面首页 写起,每一条 case 的结束,都要想办法回到 首页
二、 项目内容 1. configs 项目配置 —- settings.py
1
2
3
4
5
6
7
8
9
10
desire_caps = { "platformName" : "Android" , "platformVersion" : "10" , "deviceName" : "X4UOCQOF79AUZX79" , "appPackage" : "com.hpbr.bosszhipin" , "appActivity" : "com.hpbr.bosszhipin.module.launcher.WelcomeActivity" , "noReset" : "True" , "newCommandTimeout" : 6000 , "automationName" : "UiAutomator2" }
驱动 —- myDriver.py
1
2
3
4
5
6
7
8
9
10
11
12
13
14
from appium import webdriverfrom settings import desire_capsclass MyDriver : _driver = None @classmethod def get_driver (cls ): if cls._driver is None : cls._driver = webdriver.Remote("http://127.0.0.1:4723/wd/hub" , desire_caps) cls._driver.implicitly_wait(10 ) return cls._driver
2. libs 操作 —- basePage.py
1
2
3
4
5
6
7
8
9
10
11
12
13
14
15
16
17
18
19
20
21
22
23
24
25
26
27
28
29
30
31
from utils.myDriver import MyDriverclass BasePage : def __init__ (self ): self.driver = MyDriver.get_driver() def swipe_up (self, t=1000 , n=1 ): """向上滑动半个屏幕""" l = self.driver.get_window_size() x1 = l["width" ] * 0.5 y1 = l["height" ] * 0.25 y2 = l["height" ] * 0.75 for i in range (n): self.driver.swipe(x1, y2, x1, y1, t) def swipe_down (self, t=1000 , n=1 ): """向下滑动半个屏幕""" l = self.driver.get_window_size() x1 = l["width" ] * 0.5 y1 = l["height" ] * 0.25 y2 = l["height" ] * 0.75 for i in range (n): self.driver.swipe(x1, y1, x1, y2, t)
3. test_case 1 2 3 4 5 6 7 8 9 10 11 12 from utils.myDriver import MyDriverdriver = MyDriver.get_driver() def test_update_pwd (): driver.start_activity("com.hpbr.bosszhipin" , "com.hpbr.bosszhipin.module.launcher.WelcomeActivity" )


