web UI 自动化实战 一、 项目结构
整体的编写逻辑:
1、先设计功能测试用例
2、然后分析这个用例,用到了那些页面,哪些元素,封装在 pages
3、将功能测试用例翻译成代码
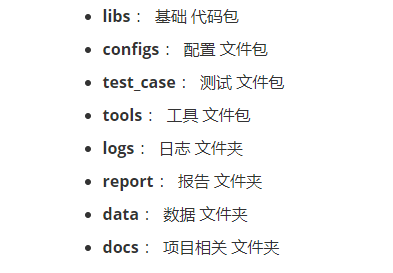
四包文件 :
libs : 用于存放 基本的 代码;configs : 用于存放 配置文件;test_case : 用于存放 测试用例;tools : 用于存放 封装的 工具
四文件夹:
docs : 主要用于存放 和项目相关的文件;logo : 主要用于存放 项目执行的日志;report : 用于存放报告的 原始数据;data : 用于存放 测试数据;
二、 项目内容 1. configs 初始化浏览器对象 —- myDriver.py 1 2 3 4 5 6 7 8 9 10 11 12 13 14 15 16 17 18 19 20 21 22 23 24 25 26 27 28 29 30 31 32 33 34 35 36 37 38 39 40 from utils.mySettings import url, username, password, implicitly_time_outfrom selenium import webdriverclass Driver : _driver = None @classmethod def get_driver (cls, browser_name="chrome" ): """ 获取浏览器对象 :param browser_name: 浏览器类型 :return: """ if cls._driver is None : if browser_name == "chrome" : cls._driver = webdriver.Chrome() elif browser_name == "firefox" : cls._driver = webdriver.Firefox() else : raise ("没找到浏览器类型 %s, 请检查传参" % browser_name) cls._driver.implicitly_wait(implicitly_time_out) cls._driver.maximize_window() cls._driver.get(url) cls.__login() return cls._driver @classmethod def __login (cls ): cls._driver.find_element_by_id("username" ).send_keys(username) cls._driver.find_element_by_id("password" ).send_keys(password) cls._driver.find_element_by_id("btnLogin" ).click() if __name__ == '__main__' : Driver.get_driver()
配置项目环境 —- mySettings.py 1 2 3 4 5 6 7 8 9 10 11 12 13 14 15 16 17 18 19 20 21 22 23 24 current_env = "pro" env_dict = { "test" : "dsadasd" , "uat" : "dsadsad" , "pro" : "http://120.55.190.222:38090/#/login" } url = env_dict[current_env] username = "老师" password = "123456" implicitly_time_out = 5 time_out = 5 poll_frequency = 0.5
项目目录 —- pathSettings.py 1 2 3 4 5 6 7 8 import timeimport osbase_dir = os.path.dirname(os.path.dirname(__file__)) report_path = os.path.join(base_dir, "report" , time.strftime("%y-%m-%d" ))
2. libs
UI 自动化一般采用 元素定位元素操作
1 2 3 4 5 6 7 8 9 10 11 12 13 14 15 16 17 18 19 20 21 22 23 24 25 26 27 28 29 30 31 32 33 34 35 36 37 38 39 40 41 42 43 44 45 46 47 48 49 50 51 52 53 54 55 56 57 58 59 60 61 62 63 64 65 66 67 68 69 70 71 72 73 74 75 76 77 78 79 80 81 82 83 84 85 86 87 88 89 90 91 92 93 94 95 96 97 98 99 100 101 102 103 104 105 106 107 108 109 110 111 112 113 114 115 """添加商品页面""" from pages.basepage import BasePagefrom publicLib.public import ran_strimport timeclass AddProductPage (BasePage ): def __init__ (self ): super ().__init__() self .url = "http://120.55.190.222:38090/#/pms/addProduct" def product_classification_select_box (self ): """商品分类下拉框, 外框""" return self .driver.find_element_by_css_selector("form > div:nth-child(1) .el-cascader__label" ) def product_classification_select_box_idx1 (self, idx1 ): """商品分类下拉框, 一级分类""" return self .driver.find_element_by_css_selector("ul.el-cascader-menu > li:nth-child(%s)" % idx1) def product_classification_select_box_idx2 (self, idx2 ): """商品分类下拉框, 二级分类""" return self .driver.find_element_by_css_selector("ul + ul.el-cascader-menu > li:nth-child(%s)" % idx2) def product_name_input_box (self ): """商品名称输入框""" return self .driver.find_element_by_css_selector("label[for=\"name\"] + div input" ) def product_subtitle_input_box (self ): """副标题输入框""" return self .driver.find_element_by_css_selector("label[for=\"subTitle\"] + div input" ) def product_brand_select_box (self ): """商品品牌下拉框外框""" return self .driver.find_element_by_css_selector("label[for=\"brandId\"] + div input" ) def product_brand_select_box_option (self, idx ): """商品品牌下拉框, 一级分类""" return self .driver.find_element_by_css_selector("body > div:nth-child(8) ul > li:nth-child(%s)" % idx) def next_step_commodity_promotion_button_box (self ): """下一步, 填写商品促销按钮""" return self .driver.find_element_by_xpath("//*[text()=\"下一步,填写商品促销\"]" ) def is_herald_box (self ): """预告商品开关""" return self .driver.find_element_by_xpath("//*[text()=\"预告商品:\"]/..//span" ) def next_step_product_attribute_button_box (self ): """下一步, 填写商品属性按钮""" return self .driver.find_element_by_xpath("//*[text()=\"下一步,填写商品属性\"]" ) def next_step_choose_product_related_button_box (self ): """下一步, 选择商品关联按钮""" return self .driver.find_element_by_xpath("//*[text()=\"下一步,选择商品关联\"]" ) def submit_product_button_box (self ): """完成, 提交商品按钮""" return self .driver.find_element_by_xpath("//*[text()=\"完成,提交商品\"]" ) def confirm_submission_box (self ): """确认提交按钮""" return self .driver.find_element_by_css_selector( "[class=\"el-button el-button--default el-button--small el-button--primary \"]" ) class AddProductPageAction (AddProductPage ): def add_product_action (self, idx1, idx2, product_name, subtitle, brand_select_idx ): """ 添加一个商品 :param idx1: 商品分类一级分类下标 :param idx2: 商品分类二级分类下标 :param product_name: 商品名称 :param subtitle: 商品副标题 :param brand_select_idx: 商品品牌一级分类下标 :return: """ self .to_page(3 , self .url) self .driver.refresh() self .product_classification_select_box().click() self .product_classification_select_box_idx1(idx1).click() self .product_classification_select_box_idx2(idx2).click() self .product_name_input_box().send_keys(product_name) self .product_subtitle_input_box().send_keys(subtitle) self .product_brand_select_box().click() self .product_brand_select_box_option(brand_select_idx).click() self .next_step_commodity_promotion_button_box().click() self .is_herald_box().click() self .next_step_product_attribute_button_box().click() self .next_step_choose_product_related_button_box().click() time.sleep(0.3 ) self .submit_product_button_box().click() self .confirm_submission_box().click() AddProductPageActionObj = AddProductPageAction() if __name__ == '__main__' : AddProductPageActionObj.add_product_action(1 , 1 , "测试%s" % ran_str(5 ), "测试%s" % ran_str(5 ), 1 )
浏览器公共类 —- basePage.py 1 2 3 4 5 6 7 8 9 10 11 12 13 14 15 16 17 18 19 20 21 22 23 24 25 26 27 28 29 30 31 32 33 34 35 36 37 from selenium.webdriver.support import expected_conditions as ecfrom selenium.webdriver.support.wait import WebDriverWaitfrom utils.mySettings import time_out, poll_frequencyfrom utils.myDriver import Driverimport timeclass BasePage : def __init__ (self ): self .driver = Driver.get_driver() def get_element (self, locator ): """ 走显示等待的逻辑,寻找元素 :param locator: 元素定位的方法和表达式,以元组形式传入,示例(By.ID, "abc") :return: """ WebDriverWait( driver=self .driver, timeout=time_out, poll_frequency=poll_frequency).until( ec.visibility_of_element_located(locator)) return self .driver.find_element(*locator) def to_page (self, time_wait, url ): """ 页面刷新 """ time.sleep(time_wait) self .driver.get(url)
公共方法 —- public.py 1 2 3 4 5 6 7 8 9 10 11 12 13 14 15 16 17 18 19 20 21 22 23 24 25 26 27 28 29 30 31 32 33 34 35 36 37 38 from utils.pathSettings import report_pathimport randomimport stringimport timeimport osdef new_report (): """ 生成最新的测试报告文件,此处只返回路径 :return: """ file_name = time.strftime("%y-%m-%d_%H_%M_%S" ) ret_path = os.path.join(report_path,file_name) return ret_path def ran_str (num ): """ 随机生成 num 个字符串 :param num: :return: """ str1 = string.ascii_letters str2 = string.digits salt = "" .join(random.sample("%s%s" % (str1, str2), num)) return salt if __name__ == '__main__' : print (new_report())
4. test_case 1 2 3 4 5 6 7 8 9 10 11 12 13 14 15 16 17 18 19 20 21 22 23 24 25 26 27 28 29 30 31 32 33 34 35 36 37 38 39 from libs.productListPage import ProductListPageActionObjfrom libs.addProductPage import AddProductPageActionObjfrom tools.public import ran_strimport allureimport time""" 可以将一个场景下的case,都维护在一个py里边 每个测试用例,都写一个对应的测试函数 """ class TestAddProductCase : def test_add_product_case (self ): """添加商品后, 商品列表的第一个商品名称就是我们添加的""" with allure.step("添加一个商品" ): product_name = "自动化%s" % ran_str(5 ) allure.attach("新增的商品名称是%s" % product_name, "./a.txt" , attachment_type=allure.attachment_type.TEXT) AddProductPageActionObj.add_product_action("1" , "1" , product_name, "副标题%s" % ran_str(5 ), "1" ) with allure.step("进入商品列表" ): ProductListPageActionObj.to_page(3 , ProductListPageActionObj.url) time.sleep(3 ) ProductListPageActionObj.driver.get_screenshot_as_file("./a.png" ) allure.attach.file("./a.png" , attachment_type=allure.attachment_type.PNG) with allure.step("获取第一个商品的名称" ): first_product_name = ProductListPageActionObj.first_tr_product_name_txt_box().text with allure.step("执行断言" ): assert product_name == first_product_name